Happy Halloween! (For Tomorrow)
Hello, today I'm going to show you the makeup and hair I'm planning on wearing for Halloween. Its a great last minute look as I had all of this and didn't need to buy anything new. The items used your most likely to already own otherwise you can purchase them for an inexpensive amount. Hope you enjoy.

First I'm juts going to apply a foundation that's slightly lighter than my natural skin tone to make me appear paler than I actually am. Here I'm using 'Revlon's Photo Ready foundation' in the shade '004 Nude'. I have to admit for my skin type I don't find this to be a great concealer it would suit much better for people with oily skin but it'll do for Halloween. I just loaded 2 pumps onto my hand and blended it in a circular motion all over my face using my Real Techniques Expert Face Brush.

Now just for a slight more coverage I'm applying my holy grail concealer, 'Collection Ever Lasting Perfection', in the shade 'Medium 3'. I just dot this where I have any redness or scaring from blemishes. I don't apply this under my eyes, which you'll find out why later. Again I bland this in using my Expert Face Brush, as I find it gives the best coverage.

Now I just like to powder my face, to set the foundation and concealer. However I don't apply to much of this as I don't want my skin looking overly matte. I prefer my skin to have a dewy look to it. Here I'm using my Collection Pressed Powder in the shade 'Tender Touch 02'.

Now here's why I didn't apply any concealer under my eyes. Taking a white pencil eye liner draw a half circle from one and of your eye to the other, try to keep it around the same size as your eyes to make it look even. Also line your water line. The one I'm using is 'Maybelline's expression Kajal gentle precision eyeliner' in the shade '35 white'. I love this product it applies lovely on the water line, its so creamy and pigmented, and you could do this with one coat.

Then fill in the circle with the pencil and smoothen it out using your fingers. This makes a good base when applying eye shadow.
Now taking a flat shaded brush here I'm using this one by Real Techniques. Pack on as much white eye shadow as possible don't be shy here, as we want this to be super white. Place it on top of the eye pencil we just did, until you have a consistency your happy with. Then place it on your lid and blend out using a clean brush.

Next take a black eye pencil and lightly draw the outline of the white eye line. Be extra gentle when doing this so is you make a mistake its easy to wipe away. But if you do make a mistake don't worry as this is just a trace line were creating. Do this to both eyes until your happy with the shape.

Then go over the black eye pencil either using a liquid or pen eye liner. I used a pen as I found it easier to get the precision. This particular one is from Seventeen, and its called the 'Make Your Mark Precision Eyeliner Pen'. Once you've completed the outline feel free to add as little or as many eyelashes as you like. I only did a few and made then quite cartoon looking, as I didn't want it to look too perfect. I then lined my upper lash line with the pen very lightly just to make my lashes appear thicker.

Yay! eye's are done now were going to make the stitched mouth. First were going to do the same as we did for the eyes and using the same black eye pencil get the shape your happy with, try and get each side as symmetrical to the other as possible. When your happy with the shape go over the line with your eye liner pen, and add some lines or crosses to look like the stitches.

Finally apply generous coats of your favorite mascara. Be sure to apply lots and if you can/want to apply fake lashes, we want our lashes to appear really 'doll like', I used two coats of benefits they're real mascara. However don't apply any mascara to your bottom lashes as we want them to be as hidden as possible because we've created new ones.

However if you wanted this to be a complete drugstore look I'd recommend 'Rimmel Scandleyes' mascara, this is my favorite drugstore mascara I've tried.


Now what you want to do is take you concealer and apply it to both sides of you lips, this is so we can reshape our own lips to appear more doll like. I then smiled and dabbed this into my lips using my finger and I found it gave a better coverage.

Next using a Red Lip Liner, outline a small set of lips onto of your own. This makes the stitching look a lot more effective, and I think it just looks really cool! Then using the same lip liner rill in the outline. The reason I've used a lip liner rather than a lipstick is because lip liner's have a longer lasting power than lipsticks and we don't want your lips to start disappearing after eating all those sweets.

Wahoo! Hair time. Were going to create to high bunches. I personally do this because it reminds be of a doll more than anything else I was to do with my hair, but if you don't want to do that feel free to do your hair however you like it.
First I'm going to brush out all my hair to make sure all the knots are out. Then I'm going to split it down the middle and take each section to the top of my head and tie it off using a hairband.

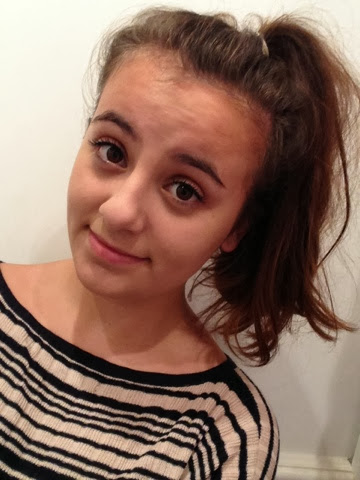
Your hair should then look like this..

And you should be done. You can wear this look with pretty much anything. I think I'm going to wear it with some tights and a black skater skirt, not sure what top yet though.

Comment bellow what your going as for Halloween, or let me know if you try to recreate this look.
Sarah
x