Google+
Showing posts with label autumn look. Show all posts

Monday, 28 October 2013

How To | Top Knot

Today I'm going to show you how I create a top knot. I love wearing this on those days whee your running late, or just having a bad hair day. Now I have thin hair and most people struggle to make a top knot with thin hair, but I have a little trick I'm going to share with you.


First I put my hair in a high pony tail, this makes it easier for later. Try using a clear elastic or a hairband that a similar colour to your hair, we don't want to be able to see the band. I find the easiest way to get my hair in a high pony tail is to flip my hair upside down, gather my hair together and the flip it back to secure.


Here's my secret if you have thin hair. back comb your hair but don't be gentle really go for it until your hair looks like a complete mess (don't worry, it'll look fine in the end). Back combing your hair make each layer thicker, adding volume to it in seconds. To keep it in place add a firming hairspray over a volumising hairspray as these hold better and for a longer period of time.


Now you should have a super backcombed ponytail. Now gather this up and I like to secure  it all with a medium sized crocodile clip. But you can use any sort of clip that you find holds your hair best. I sometimes use bobby pins when my hair is feeling extra film but the backcombing sadly doesn't last all day. So a crocodile clip allows me to volumise it throughout the day, buy raising the clip every now and then. 


Finally you can now mess around with it, until your happy with how it looks I sometimes like to clip my fringe to the side with it, or pull a few sections out to frame my face. And you should be done.


This look takes a maximum of 5 mins and is perfect for something that looks like you've spent ages on it and it doesn't. I got a lot of compliments when I first wore it and I love the look of it.

Let me know if this was helpful or if you'd wear this and let me know if you'd try to do this hairstyle in the comments or on show me your recreation of it on Instagram with the #Alarah 

Sarah
X

Saturday, 26 October 2013

Estee Lauder Double Wear Foundation | Review

Hello, today I'm going to be reviewing Estee Lauder's Double Wear Stay in Place Foundation. Hope its helpful and you enjoy.


 I asked in the store for the sample size as I wasn't sure if I wanted to buy the full size bottle, encase my skin reacted badly to it, or just encase I didn't like it. It retails at £28.50. Now this foundation has SPF 10 which isn't too high, but better than none. It claims to stay on for 15 hours, and has a medium but buildable coverage. It also says it has a semi matte finish which I like because I prefer to have a dewy finish to completely matte.


First I'm going to start with a fresh clean face, I was just in the shower so I now have a clean face and also wet hair as I like to leave my hair to air dry. But starting with a clean face allows me to see how the foundation looks on my bare skin. It helps me to make sure the color matches my skin tone, and how well its covers discoloration and blemishes on its own.


I am going to apply the foundation using the real techniques expert face brush, as I find this brush works best for me, I've done a review on it in a previous post, see it here if you haven't seen it already.


When I removed the lid I noticed it came with a small applicator, but i didn't want to use this so I just wiped the excess onto my face..


..and blended it into my skin, the first thing that I noticed was that the lady in the store matched this shade to my skin perfectly, also the coverage wasn't too high so I did build it, because I've been ill lately my skins really taken its toll. Its become very dry and it just needs a bit of help lately, so I needed higher coverage today.


After this I poured the rest of the product I would need onto my hand and blended it onto my face and down to my neck. Its important to also cover some of your neck as this makes sure there's no foundation line on your jaw line.

I first found that this foundation looked stunning on, it matched my skin perfectly and gave a great coverage. I didn't put on any concealer as I wanted to see how the foundation would cope on my skin on its own. I also found I didn't need any concealer the coverage after a few coats is amazing. It covers my dark circles and blemishes nicely so they're practically unnoticeable.


However I did put on a light coat of powder just to control the oils on my skin. So far I really like the look of this foundation on my skin, It feels so light yet gives such good coverage.


I then did the rest of my makeup, and waited to see how it would cope throughout the day. This was then 12:30, so I thought I'd take images later in the day to let you know how the foundation want looking.


This photo was taken at 4:00 and it looks the exact same as earlier if I'm honest I was thinking it would of smudged slightly but it hadn't done at all, it still felt so light and the coverage was still up there, but I could start to see a few blemishes and my dark circles starting to show though so I think if I was to purchase this I would need to use concealer for blemishes and dark circles.


This photo was taken at 8:00 and I have to say this foundation has to be one of the best I've tried. I discovered I would definitely have to use a concealer thought as I've found that the high coverage doesn't last for an overly long time. But it does last a lot longer than a drugstore foundation, I haven't found a drugstore like this so I cant compare. It just makes my skin look beautiful all day, might have to purchase the full size.

Hope you liked the post, let me know what you think in the comments bellow
Sarah
x


Tuesday, 22 October 2013

Autumn Looks and Beauty Essentials

Today I'm going to be showing you a few of my go to autumn beauty products and well as looks I wear that I created with the products mentioned, hope you enjoy.

Lips


Okay, so for autumn and winter I like to stick to either nudes or red toned lipstick, these 4 are my current favorites. I've included a mixture of price ranges as I know not everyone likes to spend a load of money on lipsticks. I've only recently started wearing lipstick more, so I don't own very many, these are just a few of the favorites I own.

Revlon Lip Butter - Peach Parfait

This lip product is a lip butter from Revlon, I love the lip butters for days where you just want a light tint to your lips, but nothing to bright. This is a nude/orange color with sparkles in! I love this color and think it would match any skin tone.

 Natural Collection - Crimson

Natural Collection lipsticks are the best cheap lipsticks that I've tried. They are very pigmented and the color that comes out on your lips is very creamy and soft. The shade I have is a faded red color. I love it if you want to have red lips but not to bright (e.g. for school). The one bad point about this brand is that their lipsticks don't stay put very long, unless you apply a pencil liner underneath. But for starting a collection and getting into lipsticks their great, and a bargain.

Rimmel London, Kate Moss lipstick - 110

These are the best lipsticks I've ever tried, and this one is my favorite, its a orange/watermelon color and smells of watermelon, I think this may have been limited edition but I'm not sure. The Kate Moss lipsticks are so creamy and pigmented and they don't budge. I would highly recommend them.

 Rimmel London, Kate Moss lipstick - 22

This is the same brand but this was not a limited edition color and sadly has no scent *cry*. But the color and overall product is still just as good however this is a bright red with a hint of pink, and its perfect for special occasions (probably wearing this shade at Christmas!)

Eyes

No7 - Antique Rose

I've been loving this color recently, and its a shade that I've only just recently rediscovered, I think my mum got this as a freebee and gave it too me and I never really used it, so I found it hidden at the back of my makeup draw and its a rose gold color that looks so stunning, this color you can really build up or leave as just a tint of color on the lid. If this product is still available I would definitely try to get it because I've been using it so much lately, its such a practical color.

Front Cover rainbow eyes (2008/2009 collection)

I've also been using this eye shadow pallet I used to use years ago that I won at a dressing up party thing (came 3rd for best dressed, wooo!). I think its got so many lovely color's in it, and they can either be really dressed up or down. All the colors are so easy to blend and very pigmented.

I've loved these colors for autumn in particular..
Blush
Chocolate Truffle
Riviear


Look 1


Face
No7 foundation
Collection Ever Lasting perfection
Collection powder - 2 (Tender Touch)

Eyes
No7 Antique Rose Eyeshadow
Bourjois liquid liner
Benefit's they're real mascara

Lips
Revlon Lip Butter - Peach Parfait

 Look 2


 Face
No7 foundation
Collection Ever Lasting perfection
Collection powder - 2 (Tender Touch)

Eyes
Front Cover eyeshadow - Blush (on lid)
Front Cover Eyshadow - Chocolate Truffle (crease & outer corner)
Bourjois liquid liner (winged out)
Benefit's they're real mascara
Max Factor Kohl Pencil - 020 Black (water line)

Lips
Rimmel London, Kate Moss - 22

Are you more likely to wear look 1 or 2, comment below
Sarah
x

Sunday, 20 October 2013

Smokey Eye Look (incorporated purple) | Perfect for Halloween

So if your thinking of sporting a smokey eye look this autumn, I thought I'd show you how to add a bit of color into your look, I added purple as i thought it would be a nice touch for Halloween. Let me know what you think in the comments and if you'd like to see more of these tutorials.

 
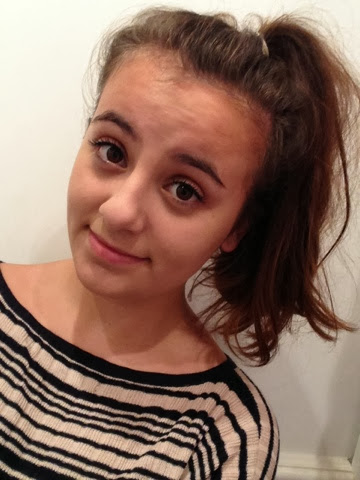
(apologies for the bad hair day, rocking the top knot!)


First to give my skin a really flawless look, I apply foundation. I've been loving this one by No7. I find it really brightens by skin while giving it a great coverage.

I like to apply my foundation using the Real Techniques Expert Face Brush which I've reviewed as you can see here: Brush Review. I really love this brush for any foundation I've tried it with, as your really able to buff the product into the skin, helping you get the best finish from your foundation.

Then the fun part, the eyes!


I first used a bright white color as the base, to really brighten the rest of the colors i'll be using in this look.


Today I decided to use this No7 palette I got a while ago and only just really rediscovered it. I chose the lightest color from this pallet and dusted it all over the lid, using the Real Techniques flat shader brush (which I used for all these eye shadows). 


Next to get the smokey effect as well as the purple I've used this palette from avon in the shade purple haze.


1 - First I started to as then black shade in my crease and outer corners, the trick when doing to is to add and small amount then with a clean shading brush blend out any harsh lines. This does take some practice and in all honesty I'm no professional and mess this up all the time, but I enjoy practicing it, and practice makes perfect.

2 - Next I add this deep purple/cranberry color in the center of my lid and blend it out. This i found helped remove the harsh lines and you only need a very small amount for this, remember you can always add on top, but cant always take off.

3 - Now just to add more of a pop of color, I decided to add this lilac color just below my water line, I found this definitely made the look a bit more festive and colorful.


Then for the eyes I decided to add a cat eye effect, with my favorite liquid eye liner from Bourjois. I love this liquid eye liner and find it easy to use on myself, I am able to get the correct shape I want as the tip of the brush applicator is very thin. But by all means use what works best for you weather that's, a pen, pencil, gel, or liquid liner.


Finally to finish off I like to follow up with a few coats of my favorite mascara by benefit, it't the they're real mascara and its defiantly the best one I've ever tried, even though you could probably find one just as good in the drugstore.

Your eyes should be looking like this or similar

Now for the rest of your face.

First to remove any fallen shadow and discoloration that may still be showing through from your foundation. I use the Collection Ever Lasting Perfection concealer. When I already have product on my lower lash line, I find it easier to apply the concealer with my fingers, this way I can stop the product getting near my shadow.


To then get rid of any shine and to keep the rest of your makeup in place, I apply the collection pressed powder, and I'm in the shade 2 (tender touch). I mainly focus this on my forehead and nose , as I still like a dewy finish to my skin.

I apply my powder using the Clinique powder brush, I've been loving this brush lately as it feels really light on your skin and doesn't pickup to much product. 


Then to contour my cheekbones I use the Jean Paul Gaultier bronzer, I think this is a great bronzer for contouring as its a matte bronzer so it doesn't make the shadow you create all glittery, and secondly it's the perfect consistency of bronze, not to orange and not to brown.


Lastly I like to add just a coat of lipgloss, by all means add a lipstick, but I found because we have alot going on with the eyes, I wanted to keep the lips nice and simple. I used the Flutter lipgloss in the shade 'Pink' and I love these lipglosses they're not sticky all and leave your lips lovely and glossy with a touch of sparkle.

I hope you enjoyed this makeup tutorial, let me know if you'd like to see more of these in future posts.

Sarah
x
Related Posts Plugin for WordPress, Blogger...